This topic addresses considerations when developing for an iOS device:
Background state management
iOS supports multitasking for all apps, however there are a few steps a
developer must go through in order to get the OpenTok iOS SDK to work well with different
app states. This document covers a set of practices we have found work well with most
OpenTok apps. However it is not a substitute for reading through the
Apple documentation
on the subject — specifically the sections on "Strategies for Handling App State
Transitions," "Background Execution," and "Tips for Developing a VoIP App". Although
Apple does not consider most OpenTok apps to be VoIP apps, the content on configuring
audio sessions and socket configuration is relevant and useful for understanding this
document.
Quick start — setting app permissions
In the Info.plist file for your app, set up the background mode
permissions as described in the Apple documentation for creating VoIP apps. The key is
UIBackgroundModes. Do add the audio value to this
dictionary. Do not add voip to this dictionary. We have seen
applications rejected from the App Store specifically for the use of the voip
flag, so it is important not to skip this step.
There is also a UI for setting app background modes in XCode 5. Under the app
build settings, open the "Capabilities" tab. In this tab, turn on "Background Modes"
and set the "Audio and AirPlay" checkbox to set the audio background mode, just as in
the method for editing Info.plist, above. For completeness, we describe both methods,
but the results are identical — you only need to use one of the methods.
What OpenTok can (and cannot) do in the background
Using the OpenTok SDK, an app can do each of the following while in the
background state:
- Keep an OpenTok session active.
- Sustain an audio-only session.
- Set audio/video flags for publishers and subscribers. For example, setting
the
OTPublisher.publishAudio property to YES is allowed.
- Publish with a custom video capture implementation that does not acquire the
camera (for example, publishing from a file or synthesized video source).
An app can resume using the camera as soon as the app returns to the active state.
However, apps cannot do the following while in the background state:
- Use the camera as a video source for a publisher.
- Set up new views with video from OpenTok streams.
- Keep an active audio session if a phone or FaceTime call is received.
- Prevent other apps from acquiring system audio resources.
- Maintain a connection to an OpenTok session without an active publisher or
subscriber.
Active OpenTok Sessions in the Background
The configuration described above allows apps to run
an active OpenTok session even while the app is in the background, presumably
as a result of the end-user pressing the home button, locking the screen, or
opening URL content in another process. The audio permission allows the app
process to stay unsuspended while in the background, if an audio session is
active. This means that audio capturing and rendering can continue in your OpenTok
session, as long as another process does not request audio resources.
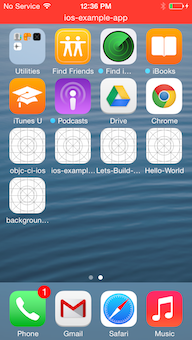
When correctly configured, iOS provides an indicator that your app is running
in the background with an active audio session. This is seen as a red background
of the status bar, as well as an additional bar indicating the name of the app
holding the active audio session — in this case, your app.
The voip option of the background mode is meant for sustaining
long-lived signaling connections to an application server. If your app needs
to be notified for application events, we recommend using
Apple Push Notifications
with your application server to wake the app and conduct a workflow. In our
testing, we found that the extra overhead of maintaining an active socket with
OpenTok was both too expensive from an energy-consumption perspective and too
unreliable to guarantee service. For this reason, we are recommending that app
developers not request this permission, unless a long-lived socket is being
provided by an implementation other than the OpenTok SDK. Additionally, the
App Store submission
guidelines call for rejection of apps that needlessly request this permission.
Losing Control
Incoming phone and FaceTime calls are likely the first events you will see that
completely interrupt your application. When this happens, your app will be
suspended, regardless of whether there is an active audio session.
If your app is suspended because the audio session yielded to another process,
there is no need for additional logic to handle this. If the app is suspended
for a long period of time, the connection to the OpenTok session will end.
Other clients connected to the session will receive connectionDestroyed events for the device connection, and an eventual cleanup will be
necessary once the app is not suspended. As long as your controller is
processing the error and disconnected delegate events for the session, this
should be no different from a voluntary, or any other, disconnect workflow.
Clients may reconnect as soon as the disconnect cleanup is processed.
Privacy manifest settings
Versions 2.27.3, 2.26.3, and 2.25.5 of the Vonage Video iOS SDK add support for the
privacy manifest required by Apple's App store. Using these versions of the SDK, the required privacy-related settings are automatically added when you
create your app's privacy report. If you need to use an older version of the Vonage Video React Native SDK, you can manually add the required privacy settings based on
the settings in this file to your own app privacy manifest file.
iOS 14 networking changes affecting relayed sessions
With iOS 14, Apple introduces local network privacy (see
this video).
Beginning in iOS 14, the operating system will prompt the user for permission
when an application attempts to subscribe to clients on the same local network
in a relayed session.
The default text in the notification says that the app "would like to find and connect
to devices on your local network."
In a relayed session, the Vonage Video API uses the local network to discover
and connect to video participants on your local network when possible. If clients
cannot connect on the local network, an application will use the OpenTok
TURN server to relay audio-video streams.
If the user does reject the permission, the attempt to subscribe can fail
if the client cannot connect to the OpenTok TURN server. In this case,
after the permission is rejected, any future attempts to subscribe to clients on
the same network will also fail unless the user changes the permission in Settings.
Unfortunately, iOS does not provide an API for an application to determine if
the user has accepted or rejected this permission.
It is important to note that this does not apply to video sessions that use the
OpenTok Media Router,
as media is sent over the internet rather than the local network.
If your application uses a relayed session, we encourage you to to add a descriptive
custom usage string to inform the user why the application needs this permission:
- In Xcode, open your app's info.plist file.
- In the info.plist editor, right-click the left-hand column and select Add Row
(or click +) to add a setting for Privacy - Local Network Usage Description.
- Edit the value for this string to describe how your app uses this permission.
For example, add "This app uses the local network to discover and connect to
video participants on the same network when possible."
The prompt to the user will include this description.
For applications which cannot use routed sessions and do not wish the user
to be prompted for local network access, you can use any of the options in the
following sections.
Skip local network checks to establish media connectivity
You can set the OTSessionICEConfig.filterOutLanCandidates property to force the application to not use the
local network to establish connectivity, as in the following code.
Objective-C
OTSessionSettings *settings = [[OTSessionSettings alloc] init];
OTSessionICEConfig *myICEServerConfiguration = [[OTSessionICEConfig alloc] init];
myICEServerConfiguration.filterOutLanCandidates = YES;
settings.iceConfig = myICEServerConfiguration;
session = [[OTSession alloc] initWithApiKey:kApiKey
                                   sessionId:kSessionId
                                    delegate:self settings:settings];
Swift
let settings = OTSessionSettings()
let myICEServerConfiguration = OTSessionICEConfig()
myICEServerConfiguration.filterOutLanCandidates = true
settings.iceConfig = myICEServerConfiguration
let session = OTSession(apiKey: apiKey, sessionId: sessionId, delegate: self,
                        settings: settings)
Note: The OTSessionICEConfig.filterOutLanCandidates property is available in OpentTok iOS SDK version 2.30.0 and later.
Use TURN servers
You can set the OTSessionICEConfig.transportPolicy
to force the application to use TURN servers to establish connectivity,
as in the following code.
Objective-C
OTSessionSettings *settings = [[OTSessionSettings alloc] init];
OTSessionICEConfig *myICEServerConfiguration = [[OTSessionICEConfig alloc] init];
myICEServerConfiguration.transportPolicy = OTSessionICETransportRelay;
settings.iceConfig = myICEServerConfiguration;
session = [[OTSession alloc] initWithApiKey:kApiKey
                                   sessionId:kSessionId
                                    delegate:self settings:settings];
Swift
let settings = OTSessionSettings()
let myICEServerConfiguration = OTSessionICEConfig()
myICEServerConfiguration.transportPolicy = .relay
settings.iceConfig = myICEServerConfiguration
let session = OTSession(apiKey: apiKey, sessionId: sessionId, delegate: self,
                        settings: settings)
More information
For more information, see:


